Bottled Rainbows: Materials List
Eeek, I'm excited! There's just something about rainbows. I suppose if you love color, rainbows are pretty much IT. I know that you are as excited as me about getting started, so I'm going to try to cover a few basis and popular questions in this post.
our Bottled Rainbow consists of 16 rectangle blocks, each finishing at 16 x20". Each block is sashed in a bold solid hue, with sashing at 2.5" wide. You'll need a quarter yard cut of each solid - so 16 cuts total. Fat quarters or regular quarters will work.

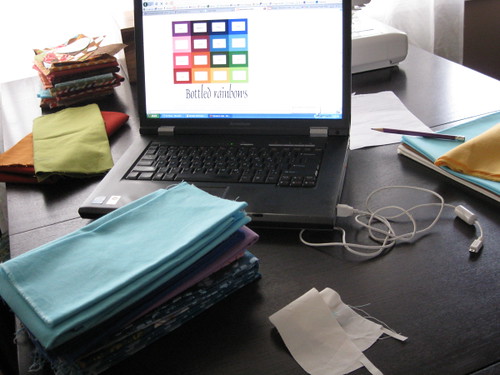
If you'd like to pull solids from your stash, use the Bottled Rainbow button as a guide. Lay out your solids to see how they relate to one another. Your favorite lime green may look quite muddy next to the mustard yellow. Of course, you can mix things up - maybe you want a bright lemon yellow instead of my mustard hue. Just be sure to keep checking to see how your colors relate to each other in the Bottled Rainbow layout.

For your reference, here is a list of the Kona solids I'll be using. In each case, the first Kona listed is the preferred shade. I've also included alternative Konas for some colors. The colors are listed starting with red in the left corner and snaking through the Bottled Rainbow color grid:
**This list and Bottled Rainbow Color Grid below updated December 2011 to reflect actual Kona's used.
Rich Red or Ruby
Pomegranate or Bright Pink
Candy Pink or Bubblegum - represented by Ta Dot above, as I need to order it!
Violet or Plum
Berry or Dark Violet or Eggplant
Cerise
Tangerine - represented by a Wendover solid above for which there is no Kona equivalent.
Orange or School Bus
Canary or Buttercup - represented by Buttercup above, which is a softer yellow that pairs well with softer greens.
Avocado or Moss
Everglade or Emerald
Marine or Deep Blue - represented by Woodcut above, as I need to order it
Pacific
Bahama Blue or Peacock - Peacock shown above
Grass or Peridot - Peridot shown above
Chartreuse or Cactus - Cactus shown above
Note: Grass Green and Chartreuse are bolder versions of Peridot and Cactus. I suggest you choose one pairing or the other. If you're going towards a brighter yellow like Canary, probably balance with Grass Green/Chartreuse.

I know that many of you will need most (or all) of these Konas. You can buy complete sets by the fat quarter or half yard at
.
the center of each block in our Bottled Rainbow is a neutral solid on which you will applique scraps in the ticker tape style. You need 2 2/3 yards of your neutral. I'm using Kona Bone, which is a creamy off white. Even though I am a linen lover, I decided against it this time as the earthy tones may muddy some colors. I suggest you choose your favorite white or cream to really let the rainbow shine!
here's where it gets fun! You'll need enough scraps to fill the neutral portion of each block, which measures 11 x 15" when finished. How many scraps is that really? Ooh, that depends.

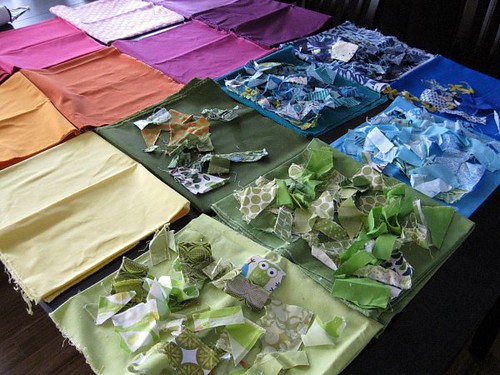
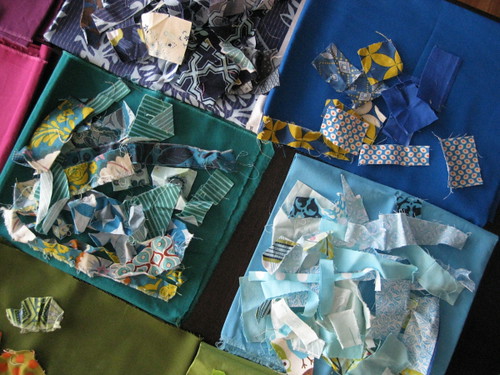
Start by emptying your scraps onto your work surface. Now divide them in 16 piles, based on color. To help you categorize your scraps by color, use any solids or proxy fabrics that you have on hand to set the standard. I laid my solids out in the Bottled Rainbows color grid, because it's pretty =).

Some of my scraps are quite small, down to about 1/2 inch. You can also use larger scraps, since you can always trim them to the desired size. And the "desired size" is really up to you, as is the amount of neutral space that you leave between scraps. I'll show you some examples later on!

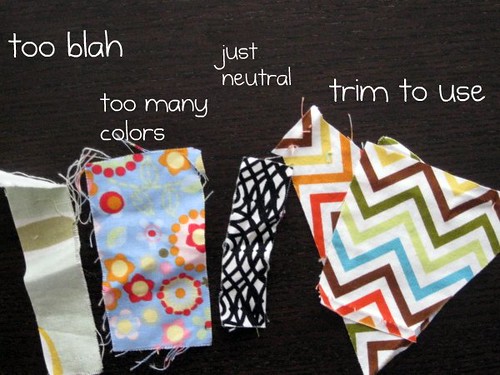
When organizing your scraps, be sure to set aside those that really don't fit. Some scraps are too "blah". They have nothing to offer your rainbow. Others have too many colors, so that they really don't fit in any camp. I did include scraps that have more than one color, as long as one color stood out as primary. Neutral scraps (black, white, brown) don't qualify, sorry. Some multi-color scraps can be trimmed down so that they fit a particular color grouping. Trim and separate!
To estimate if you have enough scraps of any one color, you can iron them flat and arrange them on a 11 x 15" space. See if they fill that space with a distance between scraps that is desirable to you.
Phew! That's a lot of info. Before I bid you adieu, here are a few more odds and ends you'll need to get started making ticker tape blocks:
Glue stick
Neutral thread
Rotary cutter and mat would be nice
We'll talk supplies for finishing, such as border, batting, backing, etc. as this project moves along. Remember, we're just making one block a week, so you have plenty of time to decide on finishing details.
Alright, start working with your rainbow!